All Activity
- Last week
-
Hi Martin, Really glad to hear this - I'm glad you've got it sorted. Nice find on the extra setting for the NVRAM! Happy to help. Archie
- Earlier
-
Hi Archie - yes, it is the Flat Panel Type setting which needs to be 'XGA 1x18' rather than 'Auto' which is what the default setting is. For information, the only other setting which needs to be changed after defaults have been loaded is under Advanced Chipset Control, where 'Enable Memory Gap' needs to be set to 'Extended' rather than 'Disabled'. Otherwise you get a permanent 'Non-volatile RAM Fail/Replace Battery' message at boot-up. Very many thanks for your help - this was driving me insane! Martin
-
@Archie D has made this assumption because you have posted in FLX S. If you actually have a full FLX then recording a macro that is then triggered by OSC would be the way to go. However, all may not be lost if you are really on FLX S. You could record a cue that releases playbacks (see manual here) and then trigger that from OSC. A similar cue could also trigger all the cues you want to run. I'm not sure of the timings (whether releases are done before or after triggers) but you could even try putting all your releases and triggers on the same cue.
-
Hi @Rye, The easiest option here if you were using a full-size FLX would be to use macros. Macros have the ability to capture press and hold events on front-panel buttons, therefore you can record a macro that records key presses (not syntax commands), hold CLEAR and tap the Fader Function button (same as the FLX S Channels/Playbacks button). You could then execute this macro via OSC.. /zeros/macro/1 for example. As you're on FLX S however, the above won't work as user macros are not a feature of FLX S consoles. There isn't an OSC command to release all playbacks, so you're right - you would have to release each one with its own individual network cue. To simplify operation though, you could make each network cue follow on from the previous one so you can trigger the first playback release network cue and each playback (1-96) gets released at the same time. If you were using QLab, this could be done with a group cue instead. I hope this helps. Archie
-
Silly me - yes, that of course could have been a possibility. Probably was unstable in some way, making the main console drop out so the backup took over as the main was considered 'offline'. Fantastic to hear your main FLX didn't crash. Anyway - I hope the show went well, great pic!
-
Maybe there is a better way of doing this - but I'm setting up a show with Audio/Light cues that sync up - and found Multiplay to be a great tool. I've been able to get it to work no problem so far - but I was wondering if there's an OSC command that like, essentially just clears all current lighting/playbacks. We have a bunch of random colour playbacks set up at the moment, and a handful of other cue stacks for some old shows. I've occasionally run into issues where something I'm doing on OSC/Multiplay can be interferred if there's any pre-existing playbacks that happen to already be running. I know there's the option to clear all Playbacks by holding Clear and then tapping the Channels/Playbacks button, but I was wondering if there's a Trigger command that does the same thing. There's the Blackout one, but that just dims without clearing/releasing. There's also the Release command - but that only does a specific Playback or the current Playback. Best thing I could think of was just running like, 96 commands to manually clear every single Playback - but that seemed like overkill and a hassle.
-
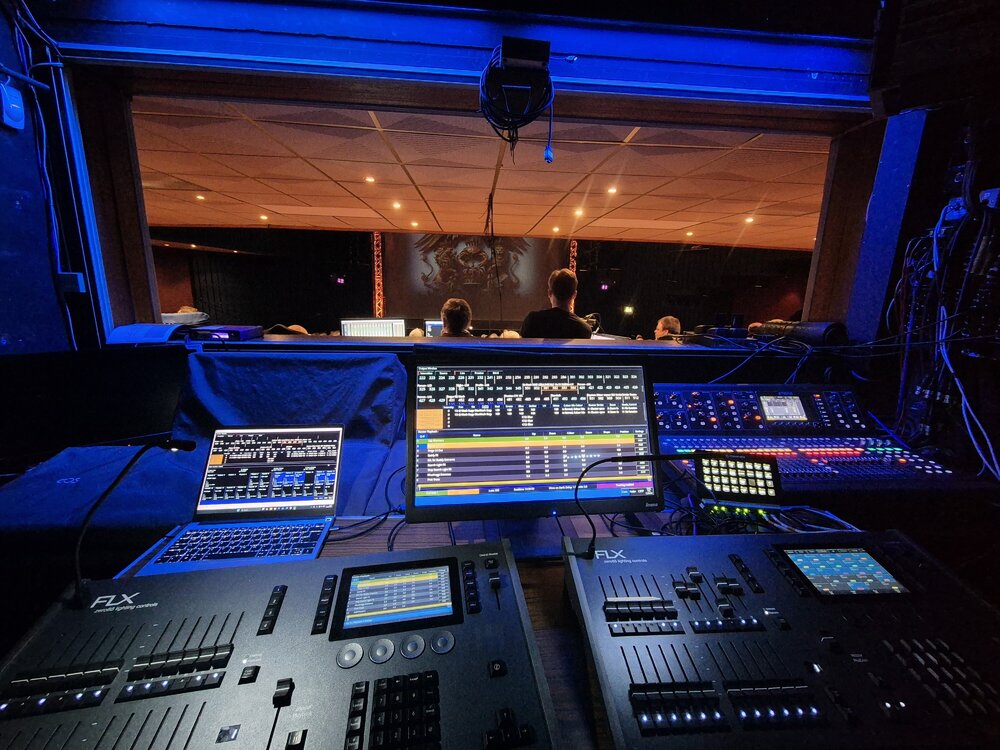
Not sure really! I was running two switches, three Art-Net Nodes, one Wi-Fi AP, one Stream Deck, and a local laptop networked in for running ZerOS Monitor. Vari-Lite email support could only offer the suggestion that it would have been due to an unstable network. There could be some mileage in that as my laptop did occasionally drop connection to ZerOS Monitor. Anyway, its all over and done with now, I never ran them in tracking, however was ready to rapidly connect in the backup ethernet cable if my primary desk crashed during a show, which it didn't (hooray!) Pic for prosperity - stuck at the back of the box behind the venue desks - main sound FOH, running audio feeds into venue mixer
-
Hi Martin, No problem - let me know how you get on. Archie
-
Thanks Archie - I'll check this out once I'm back in front of the console. Much appreciated!
-
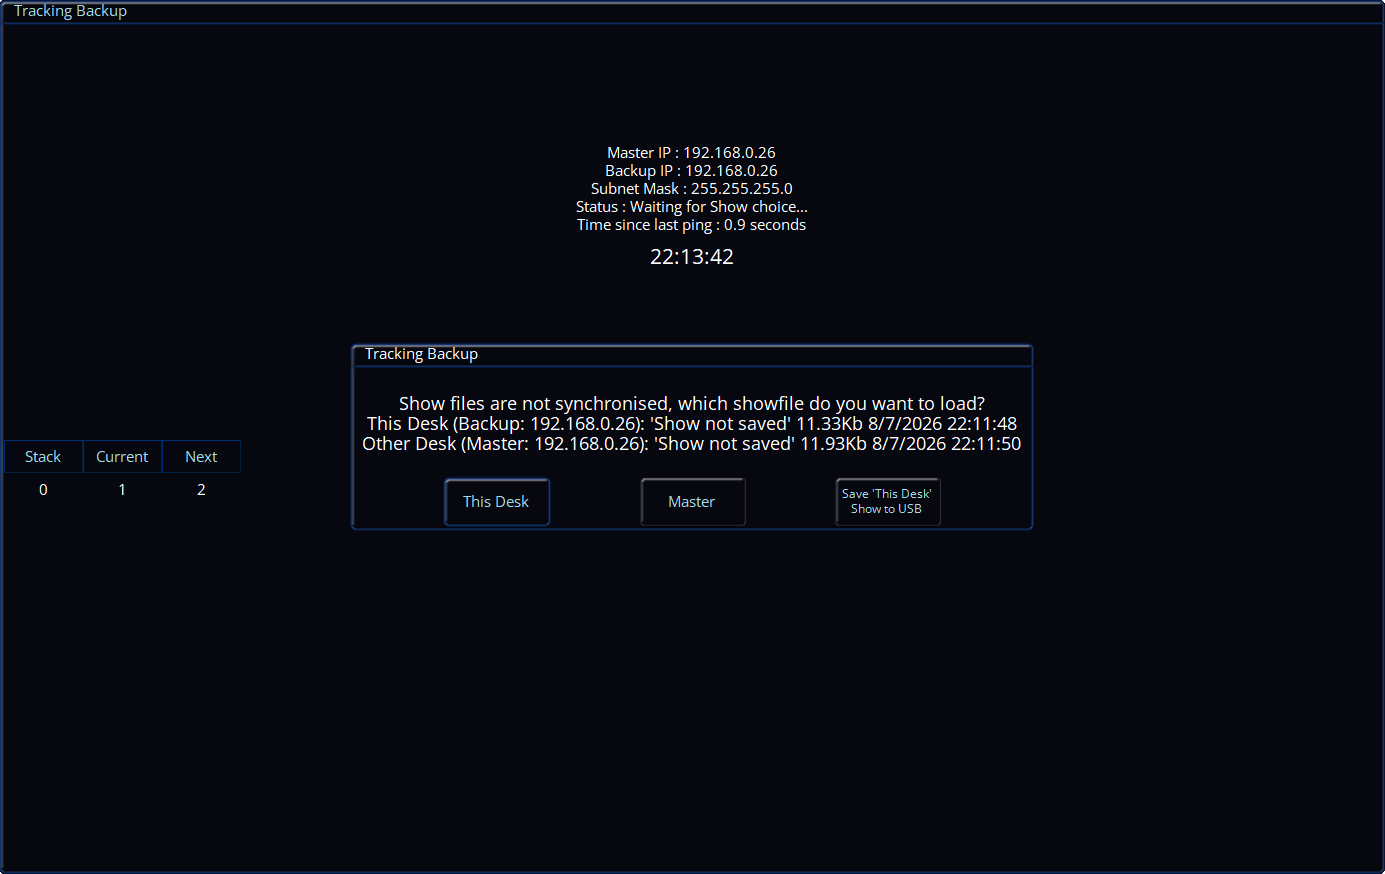
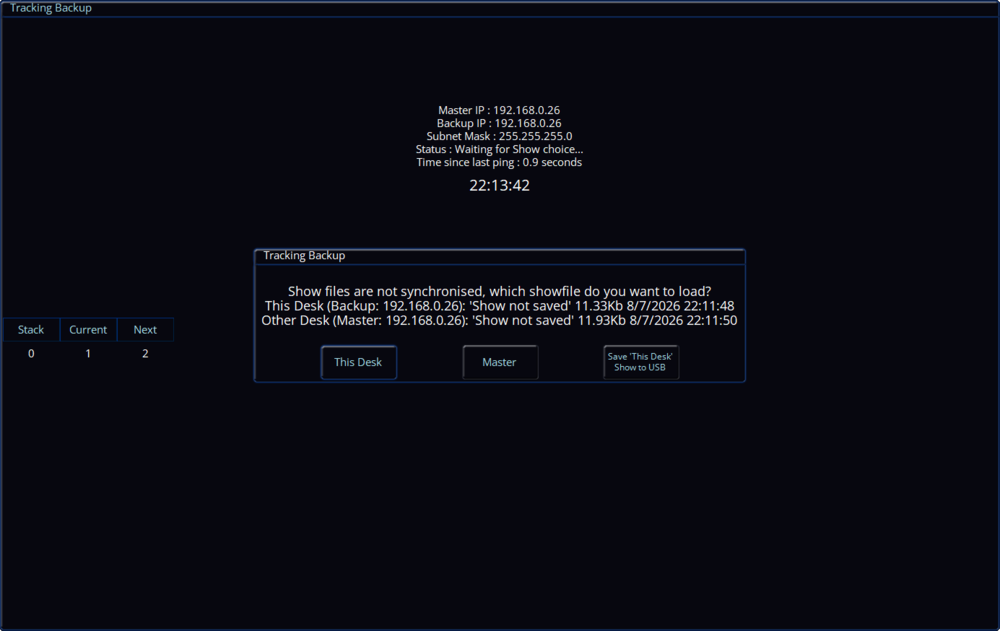
Hi @scottydog75, Tracking backup ensures that the master and backup desk(s) are synchronised - so when an update is made on the master desk (e.g. a cue is recorded, a playback is raised), it is automatically transferred to the backup desk without any prompts. Therefore, making edits to the showfile on the master desk shouldn't force the backup desk to take over. You'd get a prompt (as seen below) asking which show file you want to use when taking back control on the master desk if the backup desk has already taken over, along with the ability to save the current showfile on that desk to a USB storage device. At the time, were you using DHCP, or did you assign the desks static IP addresses? Perhaps something was conflicting with the master desk using static IPs, meaning the master desk couldn't acknowledge the backup desk to say 'Yes, I'm still here!', therefore the backup desk took over? Or, perhaps some packets were lost over the network and again, the backup desk couldn't pick up that the master desk was still alive...
-
Hi Martin, The only BIOS section which pops out to me regarding this issue is Advanced > Display Control. The settings are as follows: Display Mode: [CRT+LFP] Flat Panel Type: [XGA 1x18] Flat Panel Scaling: [Stretched] If those settings are already as listed, it may be a dodgy connection internally to the Monitor 2 VGA port causing a colour to not be output, giving you an image without the correct colours. If you're confident in opening the desk, it would be worth checking this. I hope this helps. Archie
-
Hi @Martin J, I'm fairly confident that Frog2 and Orb Series consoles have the same BIOS as each other, so when I'm home I'll make a list of all the BIOS settings for you. Failing that, some soldered connections on the VGA connector itself for monitor 2 may be faulty, therefore not giving all colours on the display output. The VGA port has individual pins for Red, Green and Blue colours, so one of those might be causing the issue you're experiencing. Archie
-
Gone are the days where beta testers would have had early visibility to assist with identifying wider usability observations...
-
Hi to all. I am hoping that one of you may be able to help with a list of the correct Bios settings for the Orb desk. Ours has sideview reset its Bios settings to default. Through lengthy trial and error, the desk has finally been made to work again and it now loads ZerOS as normal but I have been unable to make the Monitor 2 video output show the correct colours on the display. (It's not a display issue - I've tried swapping over). Monitor 1 video is fine. How is the Monitor 2 video generated? Many thanks for any words of wisdom! Best regards, Martin
-
Hi @O Thompson, You probably found that this was because SmartTag was enabled in the Record Options window. Recording home values worked fine, but default values did not because SmartTag ignores fixtures with zero intensity. Your home values had the fixtures at an intensity higher than zero, therefore they were included in the record operation. Another solution to not seeing your fixtures move when your playback is raised is by viewing the playback settings (SETUP + Playback Button) -> Button Function -> Go (Snap) -> OK. Now, you can tap the playback's button to prep your fixtures (position, beam, shape and colour) and then raise the fader to bring intensities up. If you wish to preserve the current setting for button function, you can instead change the shifted button function (what happens when you hold SHIFT and tap the playback's button). To do this, hold SHIFT while tapping the new button function. Now, hold SHIFT and tap the playback's button to prepare your fixtures. If you wish to use this method instead (it allows for multiple different positions of fixtures with lots of playbacks), you can restore your fixture's default values to their default values by selecting them and tapping DELETE -> Home -> Default. I hope this helps. Archie
-
Updated to 8.0.1 and used successfully without issue in three shows now.
-
Ah, well, while the manual reference provided by @kgallen gives you the structure of OSC messages you still have to choose which ones to use and that will depend on what the you think is the easiest to program. For your panto I would look at simply sending a "go" for the next cue in your show. This probably simplifies your sending system and you are not going to get away with not programming states whatever you do. For live music you may want to use a manual input to trigger specific cues or playbacks. I work in music venues and have a fairly sophisticated (new) TouchOSC interface to select colours, positions, gobos and effects quickly. These are all stored as cues in separate playbacks for each of colours, positions, etc. You could use the (free) original TouchOSC to do something similar. NB Neither of these solutions fit well with chases. While there is an OSC command to control a playback's level you are probably better off triggering a cue that, in turn, triggers a chase playback (like you would have to if you wanted a chase in a programmed show). Check out the OSC "release" message, you may need this to stop chases/effects when busking. Also, look at macros for setting bpm (for panto) and/or having a tap button (for music but, maybe, for panto).
-
Others will know better but over a network you’re probably looking at OSC https://www.zero88.com/manuals/zeros/setup/triggers/osc-examples Lots of post on this in the FLX and FLX S forums, have a look round.
-
 KevTheSoundGuy joined the community
 -
We've been looking into replacing our old Leapfrog (which has broken down 3 times in the last 2 years) with an S48 The lack of a simple way to synchronise sound and light is a serious shortcoming with the S24/S48. even the cheapest and nastiest desks have this facility. In a previous existence we used this desk https://www.thomann.co.uk/botex_dc2448_light_operator.htm (believe me the cheapness and nastiness shines through when you want to do something special with it There are two main uses for this facility Pantomime. There are frequent song & dance numbers where having the lights 'dance to the same tune' as the performers would enhance the show. Yes the music is usually pre-recorded so timed changes could be programmed but this is very time consuming during setup Our last pantomime had TWELVE song'/dance routines Live music shows/gigs. Here it's likely you'd want to program a number of chases and then choose which chase to use depending on the songs played. I'm building a box with an audio input that can provide multiple digital outputs (it was intended to connect to the leapfrog trigger inputs). It would be possible to have a wifi connection on the box Our setup uses an Ethernet connection to some Artnet to DMX receivers. My view is once the location has networking it's possible to connect anything we need to that network What I'm unsure about is the structure of any messages I would need to send to act as a trigger
-
Hi all, I'm currently running a show where I've hired in another FLX as a tracking backup, as I can't afford any crashes during the run. This is the first time I have ever tried setting up tracking before, and I was testing it during the dress rehearsal last night. As per the guide https://www.zero88.com/manuals/zeros/setup/devices/tracking-backup I have made sure that each desk is on a separate IP and they were communicating with each other (using Art-Net). What was strange was that the backup desk kept taking control every so often without the prompt or need to do so. I have made an assumption that it is doing this because I was updating the cue stack on the main desk, and then it is pushing this update across to the backup desk. The backup desk then thinks it is running a newer show file than the main desk, and therefore takes control - however I could be misinterpreting this, and some other weird network force could be at play? Does anyone have any reliable experience with tracking backup, and may be able to provide any pointers? Will this be more reliable once I stop making updates to the cue stack - which I am unlikely to be doing so during the actual show (opens tonight!) Many thanks
-
Ensure Pan and Tilt are tagged (blue background). Record --> Home --> Default should achieve what you are trying to do.
-
Seems this is linked to a preset key i had programmed for RGB mixing. Disabling this allowed me to update the default position.
-
Morning all, Im hoping this is a quick one, and down to my own oversight... Im trying to alter the default position of some moving heads, to prevent seeing a move when playbacks are raised. I have saved both an updated home position and default position, but only the home seems to function. When each fixture is selected, and i hit home, they move to the saved position... however they seem to default to a previously set position at rest. Any ideas?
-
That is pretty neat and creative solution, one which I might try myself. Not sure if the timing of it, but a cue can release another playback so you might be able to automate the release that way.
-
In my years working in IT there was "established wisdom" that you don't install even numbered releases (especially 0 releases) these generally contain new features and that often means new bugs. Odd numbers are usually bug fixes for the preceding one. Not always true of course but worth thinking about. There is also a theory of software decay. Essentially changing software can introduce bugs, even in the unchanged parts. This accelerates with the number of changes so, at first, very few bugs are introduced but, as the software becomes more complicated and new changes are built on top of old ones the number of bugs per change increases. Again, not always true but something to bear in mind as, eventually, all you are doing is fixing the bugs caused by fixing bugs. As the comments in one program I had the "pleasure" of working on said "this program is like an old car, you set out to change the air filter and end up replacing the engine" 😁