Archie D
-
Posts
121 -
Joined
-
Last visited
-
Days Won
13
Everything posted by Archie D
-
Solution not loading beyond 'Loading please wait...'
Archie D replied to Worcester RGSTech's topic in Solution & Solution XL
Hi @Worcester RGSTech, I've sent you an email that may help. Kind regards -
FLX S48 Custom Fixture Macro Select / Colour Mix Editing
Archie D replied to Rye's topic in FLX S24 & FLX S48
Hi @DALX, Yes, Brian has already kindly sent the manual, but for future reference you can find it on the ZerOS Software page inside the Fixture Tools 2.6 ZIP download as a PDF. Here is a direct download link to that ZIP file. Fixture Tools is the general package that Zero 88 released, whereas Fixture Type Editor is an individual application within that package used to create/edit .ift files and export to .ift or .uft formats. Fixture Tools also includes the Common Fixture Manager application for the original Frog Range. Hope this helps! -
Hi @alg, ZerOS 8.0.0 contained minor bugs that could crash consoles, but this has been resolved with ZerOS 8.0.1 and user feedback has been generally positive about this bugfix from what I've seen. The CRDOWNLOAD file you see is a general file that is put in place for a file that is currently being downloaded or paused and hasn't finished downloading. This is normal to see while a file is downloading. You can try downloading Phantom ZerOS 8.0.1 again here from the ZerOS Software page. I hope this helps.
-
FLX S48 Custom Fixture Macro Select / Colour Mix Editing
Archie D replied to Rye's topic in FLX S24 & FLX S48
Hi Rye, Great to hear you were able to get it working. Correct, fixtures that have red text in the Fixture Schedule are non-library fixtures. Yes, the on-board Fixture Creator & Editor within ZerOS allows for longer parameter names than Fixture Tools does. This is because Fixture Tools supports legacy desks (such as the Frog Range, Jester Range, Illusion 500 etc.) which only supported a certain amount of characters for parameter names. The ZerOS Fixture Editor allows for longer names because it doesn't have to contain compatibility for legacy desks which hold that limitation. Fixture Tools only supports loading .ift files and not .zfix files. This means that zfix files cannot be loaded into Fixture Tools to be edited, and can only be modified on the desk. One of the reasons of that is zfix files can contain multicell information, and Fixture Tools does not support multicell functionality. However, once you load in a .ift fixture file into the desk (SETUP -> Load), you can actually edit it in the ZerOS Fixture Editor from Add Fixtures. Beware though, making any edits to anything in that fixture personality within ZerOS will remove all parameter detail information you have added from Fixture Tools as it writes new parameter information when you re-save the file (in the zfix format this time), so lengthening parameter names once loaded into ZerOS isn't possible. I would only recommend doing so if you don't have any parameter detail information in that profile that is important. I hope this helps, let me know if you have any questions. -
Hi @DALX, Slight query - I can't seem to replicate your copying procedure using syntax. Typing the syntax to copy cue 1 on playback 1 to cues 5, 10, 15, 20 gives invalid syntax at the second period (1/1 Copy To 5.10. <-) as only one decimal point is allowed. This means cue 1 can only be copied to cue 5.1, disallowing the period to be used as a separator. Alternatively, using the copy window (Z/Shift -> Copy).. From 1 To 5.10.15.20 returns a new cue numbered 5.1. ZerOS is interpreting my entry as a point cue here too rather than multiple cue numbers, given that point cue numbers can only be up to 2 decimal places. The second period invalidates the further numbers anyway. In ZerOS, you can copy multiple cues to a single cue number. That single cue number acts as the starting number. For example, copying cues 1>5 to cue 10 will create cues 10 to 15. Copying cues 1+3+5 to cue 30 will create cues 30, 31 and 32. In the Copy Window, only the 'From' input box allows + and > whereas the 'To' input box doesn't. Please could you elaborate further on what you're doing to achieve this? I might be missing something. Many thanks
-
FLX S48 Custom Fixture Macro Select / Colour Mix Editing
Archie D replied to Rye's topic in FLX S24 & FLX S48
Hi @Rye, The extra window that opens when you press the encoder wheel's centre button is to display the 'Details' of that parameter on that encoder wheel. These are defined within the fixture profile itself. The on-board fixture editor (found in SETUP -> Add Fixtures -> Create new fixture, or from editing an existing fixture) is designed for quick and easy operations and doesn’t contain the ability to add or edit details of parameters. Details in a parameter are defined ranges that can be labelled, have a colour or image attached etc. For example, 0-20 is Macro 1, 21-40 is Macro 2. You'll notice the labels changing as you scroll through ranges on the encoder wheels. Details are then assigned as buttons in the window you found, its a quick way to jump to parameter ranges saving endless scrolling on the encoder wheels. To add details to parameters, you’ll need to use the Fixture Tools application. This requires a Windows PC, or a computer running Wine to emulate the Windows application (works on my Mac). Within each parameter is a 'Details' tab. Note that Fixture Tools will export fixture files in a .ift file format rather than the modern .zfix format. This means multi-cell can only be done in the on-board fixture editor in ZerOS - just something to be aware of. I’ve had a look for the manual of that fixture too, and it doesn’t seem to be anywhere. If you can find out what each channel does on your fixture, you can start to build up a fixture profile in Fixture Tools. Then, you can specify parameter detail ranges for the Macros along with any other parameter that requires the same. I hope this helps. Feel free to ask any questions. Apologies if any formatting went weird, typing this up on a phone! -
Hi Martin, Really glad to hear this - I'm glad you've got it sorted. Nice find on the extra setting for the NVRAM! Happy to help. Archie
-
Hi @Rye, The easiest option here if you were using a full-size FLX would be to use macros. Macros have the ability to capture press and hold events on front-panel buttons, therefore you can record a macro that records key presses (not syntax commands), hold CLEAR and tap the Fader Function button (same as the FLX S Channels/Playbacks button). You could then execute this macro via OSC.. /zeros/macro/1 for example. As you're on FLX S however, the above won't work as user macros are not a feature of FLX S consoles. There isn't an OSC command to release all playbacks, so you're right - you would have to release each one with its own individual network cue. To simplify operation though, you could make each network cue follow on from the previous one so you can trigger the first playback release network cue and each playback (1-96) gets released at the same time. If you were using QLab, this could be done with a group cue instead. I hope this helps. Archie
-
Silly me - yes, that of course could have been a possibility. Probably was unstable in some way, making the main console drop out so the backup took over as the main was considered 'offline'. Fantastic to hear your main FLX didn't crash. Anyway - I hope the show went well, great pic!
-
Hi Martin, No problem - let me know how you get on. Archie
-
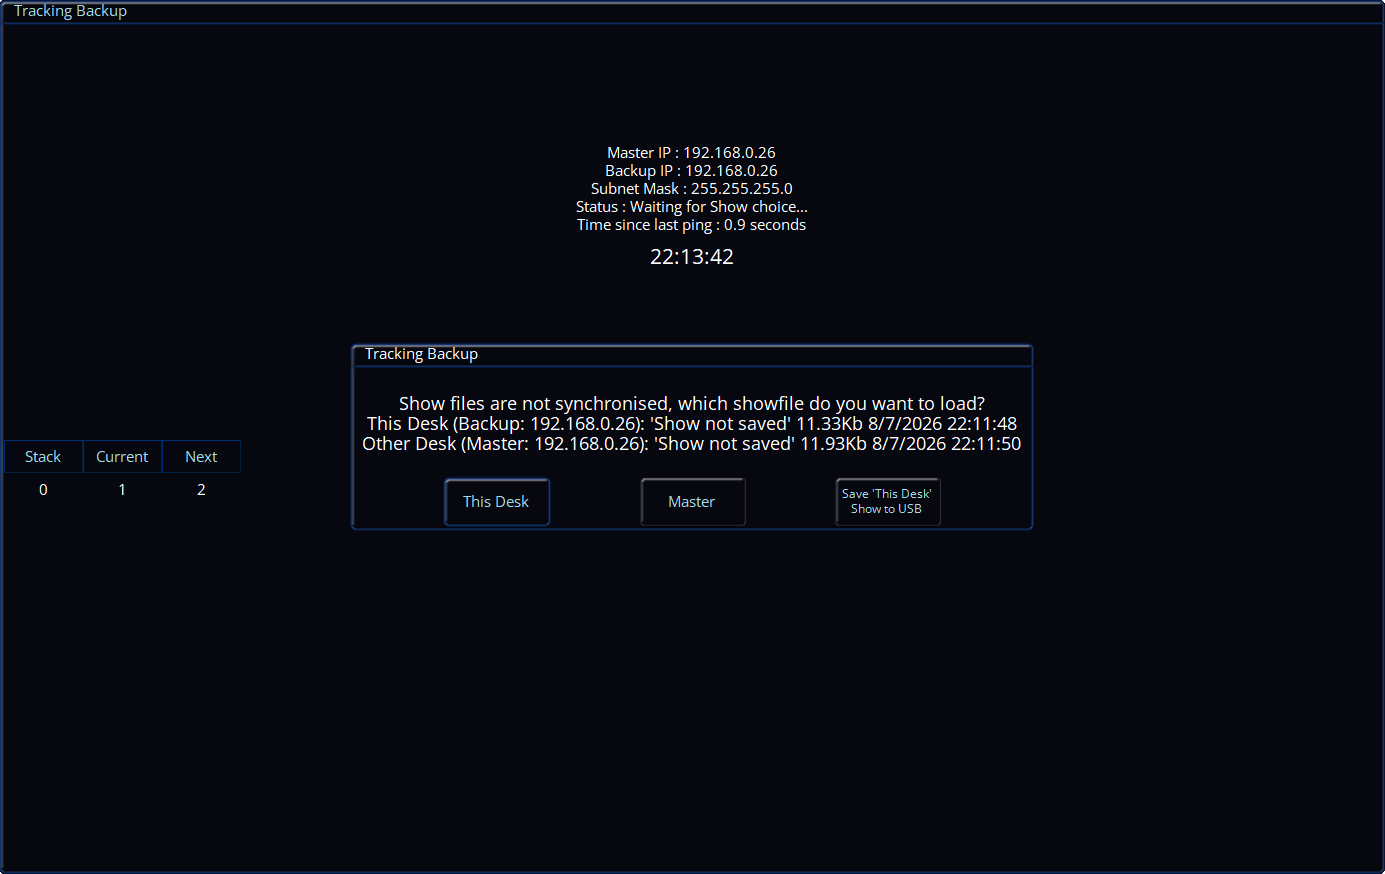
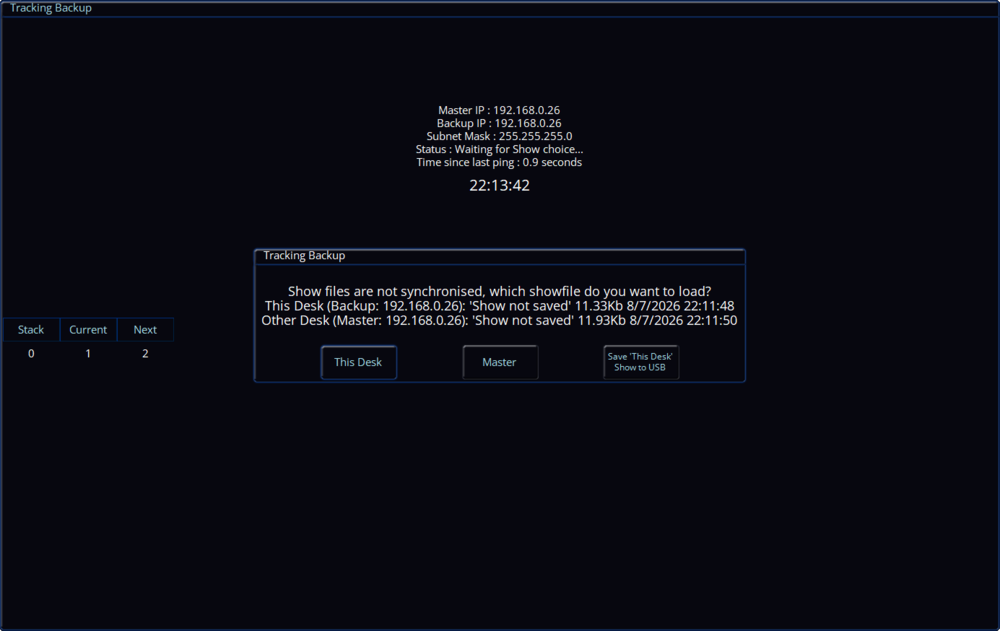
Hi @scottydog75, Tracking backup ensures that the master and backup desk(s) are synchronised - so when an update is made on the master desk (e.g. a cue is recorded, a playback is raised), it is automatically transferred to the backup desk without any prompts. Therefore, making edits to the showfile on the master desk shouldn't force the backup desk to take over. You'd get a prompt (as seen below) asking which show file you want to use when taking back control on the master desk if the backup desk has already taken over, along with the ability to save the current showfile on that desk to a USB storage device. At the time, were you using DHCP, or did you assign the desks static IP addresses? Perhaps something was conflicting with the master desk using static IPs, meaning the master desk couldn't acknowledge the backup desk to say 'Yes, I'm still here!', therefore the backup desk took over? Or, perhaps some packets were lost over the network and again, the backup desk couldn't pick up that the master desk was still alive...
-
Hi Martin, The only BIOS section which pops out to me regarding this issue is Advanced > Display Control. The settings are as follows: Display Mode: [CRT+LFP] Flat Panel Type: [XGA 1x18] Flat Panel Scaling: [Stretched] If those settings are already as listed, it may be a dodgy connection internally to the Monitor 2 VGA port causing a colour to not be output, giving you an image without the correct colours. If you're confident in opening the desk, it would be worth checking this. I hope this helps. Archie
-
Hi @Martin J, I'm fairly confident that Frog2 and Orb Series consoles have the same BIOS as each other, so when I'm home I'll make a list of all the BIOS settings for you. Failing that, some soldered connections on the VGA connector itself for monitor 2 may be faulty, therefore not giving all colours on the display output. The VGA port has individual pins for Red, Green and Blue colours, so one of those might be causing the issue you're experiencing. Archie
-
Hi @O Thompson, You probably found that this was because SmartTag was enabled in the Record Options window. Recording home values worked fine, but default values did not because SmartTag ignores fixtures with zero intensity. Your home values had the fixtures at an intensity higher than zero, therefore they were included in the record operation. Another solution to not seeing your fixtures move when your playback is raised is by viewing the playback settings (SETUP + Playback Button) -> Button Function -> Go (Snap) -> OK. Now, you can tap the playback's button to prep your fixtures (position, beam, shape and colour) and then raise the fader to bring intensities up. If you wish to preserve the current setting for button function, you can instead change the shifted button function (what happens when you hold SHIFT and tap the playback's button). To do this, hold SHIFT while tapping the new button function. Now, hold SHIFT and tap the playback's button to prepare your fixtures. If you wish to use this method instead (it allows for multiple different positions of fixtures with lots of playbacks), you can restore your fixture's default values to their default values by selecting them and tapping DELETE -> Home -> Default. I hope this helps. Archie
-
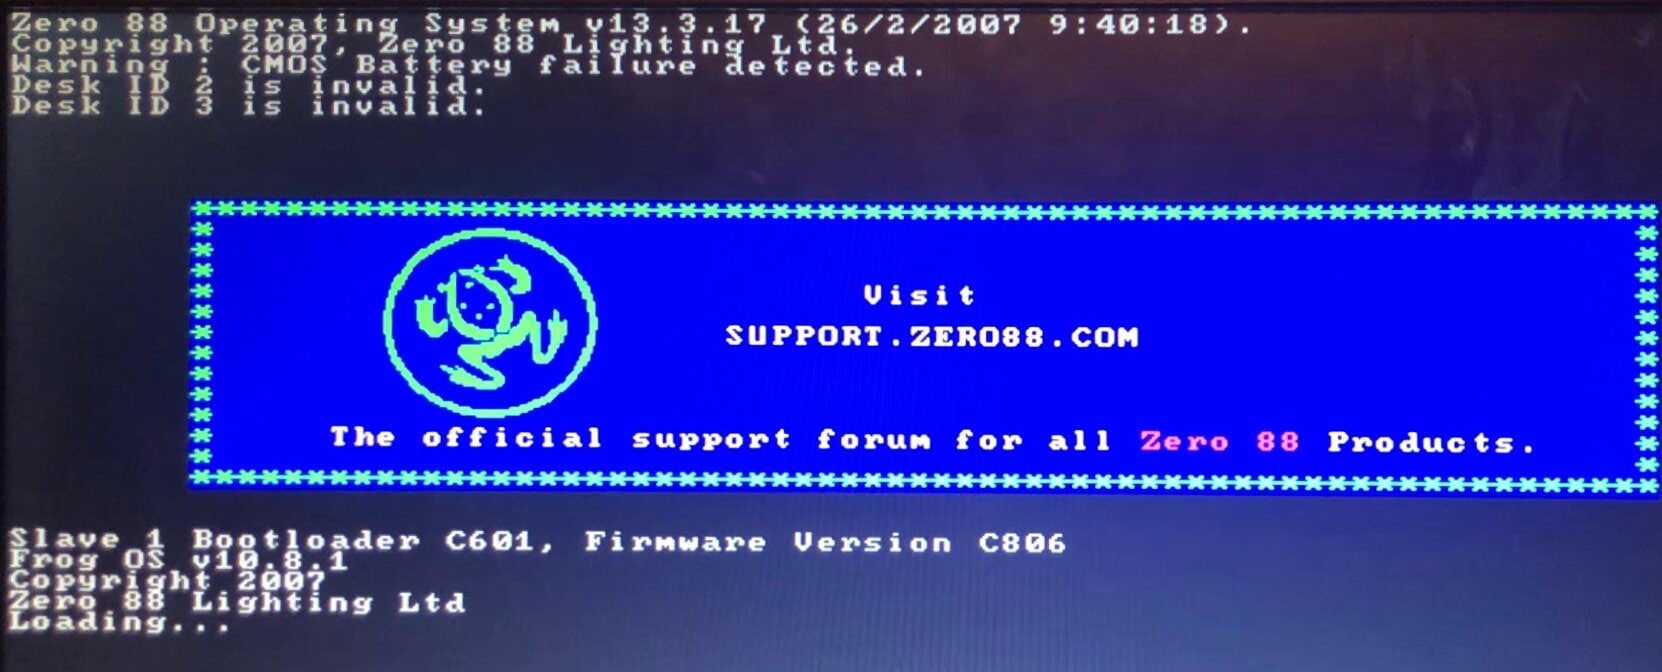
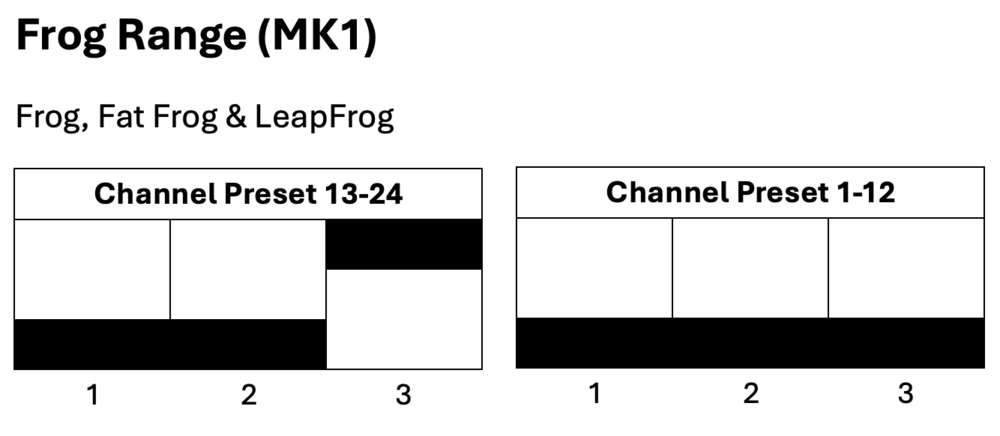
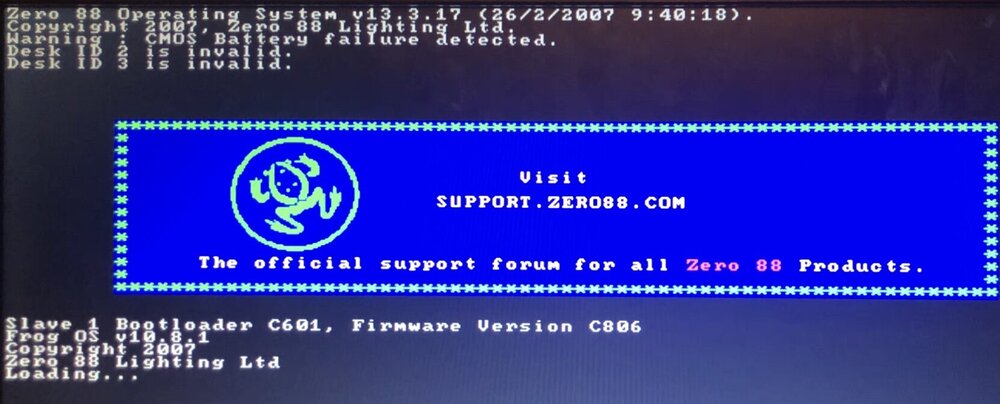
I agree with kgallen, this is most likely a battery issue. The battery is what holds the date and time along with the showfile data, so once the desk loses power it loses those if no battery is present. The time then resets and counts up from zero when powered on each time. Are you getting a message on the external monitor saying 'Warning : CMOS Battery failure detected.'? Following kgallen's advice - without attempting to reinstall the Frog Software, try powering on with a fresh battery and let the desk load into the memories screen, then cut power and turn on again. You should find that if the battery has been installed correctly, the second restart shouldn't show the 'Desk ID <number> is invalid.' message. As far as I know with the dipswitches on the channel fader PCBs, they are only used to tell the desk software which board is which. However, it would be a good idea while you've got the desk open to check they are in the correct position anyway. I hope this helps.
-
I've been running DMX out of Phantom ZerOS 8.0.1, and seems stable. Haven't experienced any crashes with regular daily use.
-
zeros functionality question for Solution
Archie D replied to Ed75's topic in Solution & Solution XL
Hi Paul, Yes - this is correct. My apologies, I should have mentioned that you'd need to delete the dimmer fixture already there. Worth noting, as a shortcut to delete all fixtures numbered 1-48, you can type 1 THRU 48 DELETE ENTER while in the Fixture Schedule tab of SETUP. The shortcut for THRU is '>' on a keyboard. Any further questions please feel free to ask. Archie P.S. they're not in the garage... they're all in the house... I may have to move out soon! -
zeros functionality question for Solution
Archie D replied to Ed75's topic in Solution & Solution XL
Hi @Muller Light, You can patch your RGBW fixture onto the faders by assigning it a fixture number of 1-48 (or 1-96 if using a Solution XL), and the fader will control the intensity. To control colour, the fixture must be selected. Solution consoles don't automatically select fixtures when channel faders are raised like FLX and FLX S consoles do, so you would need to select it manually. You can turn the channel flash buttons below the faders into fixture select buttons via SPECIAL -> Channel button mode -> Select. This replicates the behaviour of the select buttons on FLX and FLX S - tap to select, tap again to deselect. The button's yellow LED will illuminate when that fixture is currently selected. Once the fixture is selected, you can control the colour in the same way as fixtures that are on the MFKs. Hope this helps, Archie -
JesterML LCDs blank [still backlit] and MFK lcd top row malformed
Archie D replied to Archie D's topic in Jester Range
Don’t apologise - life gets in the way sometimes! I hope they’ve managed to sort the intermittent fault out. My JesterML had a ribbon cable that looked like the legs of the components on the front panel had pierced part of it. On the Blue Room, I assisted someone else identifying an issue with their front panel on a Jester 24/48. Their ribbon cable was pierced too. Seems like it might be a common thing? But not sure. Possibly could be solved by carefully cutting the component leg just below the solder joint while leaving a little bit of leg left, shortening the spike. That way the ribbon cable hopefully won’t suffer. -
JesterML LCDs blank [still backlit] and MFK lcd top row malformed
Archie D replied to Archie D's topic in Jester Range
Update time! The issue has been coming back intermittently. Rather late, but tonight I have just replaced the ribbon cable between the processor board and front panel with one which came out of my spare Juggler (has the same FC-26P connector). Will be monitoring how it does over this week and if the buggy LCD issue arises again. Will post progress on the issue. -
Hi Zulu, No worries - fantastic to hear everything’s working as intended now. Best of luck with your show! Archie
-
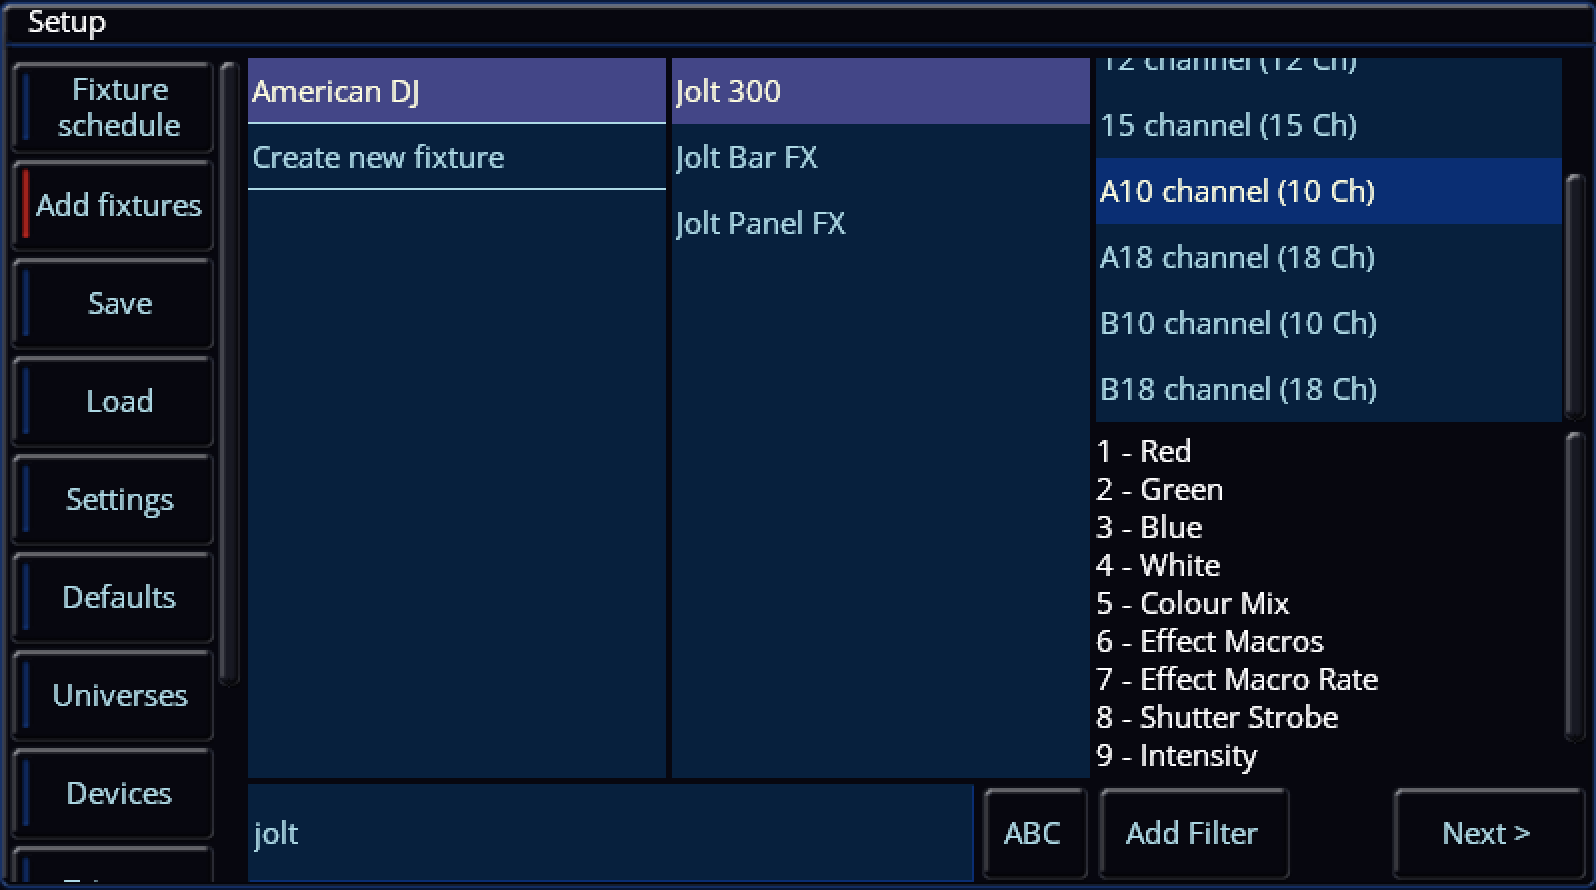
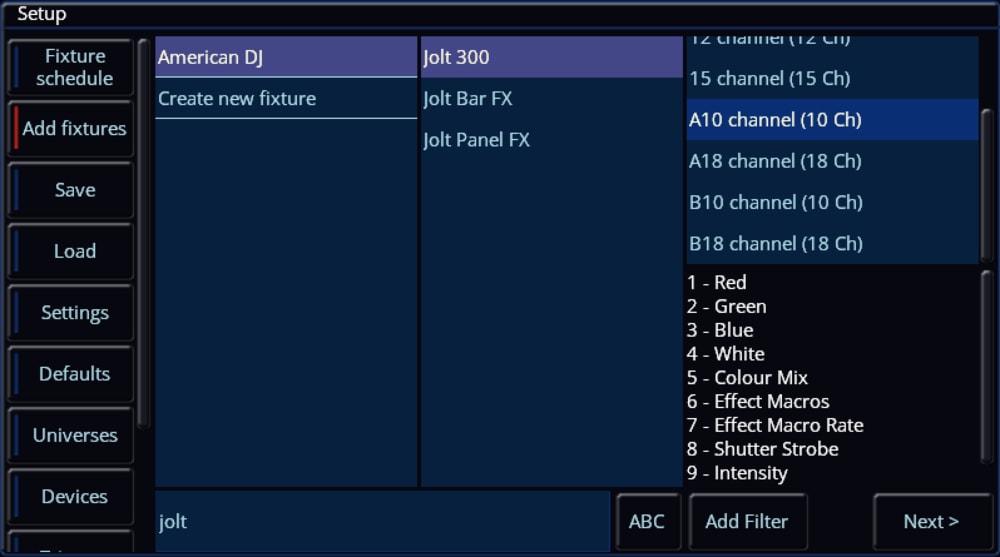
Hi @Petera, The ADJ Jolt 300 is available in the ZerOS Fixture Library on the console, therefore you won't need to match the channels to another fixture in the library. Archie
-
Hi Brian, When a playback with values stored is raised or active while recording a cue, those values are stored into that newly recorded cue. You can circumvent this by disabling Smart Tag in the Record / Update Options window (tap RECORD or UPDATE, then tap again to exit - selection will be stored). When Smart Tag is disabled, values coming from other active playbacks will not be recorded in, preventing slip-ups. The source options at the top of the Update Options window are effectively a way of telling the console what things you want to update in a single operation. It can be added to via syntax, e.g. UPDATE (the cue I am currently in is automatically in the source options), AND 2 (adds cue 2 to the source options, to specify cues from other playbacks at the same time use Playback Number/Cue Number). This means the console will be updating both the cue I am currently in as well as cue 2 with the desired 'Remove' operation. You can tap various items in the source options area to exclude them or add them, indicated with red and blue stripes. Correct - the values would be stored inside the recorded cue within the main stack, therefore they need to be removed from the cue. To remove a fixture entirely from a cue, you can follow my listed steps in my earlier post but leaving out the un-tagging of Intensity. Go into the cue, simply home the fixture(s) to tag all parameters and then remove from the cue via Update. I hope this helps - if you have any queries or require further explanation feel free to ask. Archie
-
Hi Zulu, No worries, glad to hear the solution worked on Phantom ZerOS for you. To 'fix' an individual cue, repeating the steps listed would work perfectly. However, if you have a range of cues together which all have the same problem, you could attempt using Track Forwards in the tracking options along with 'Remove' within the Update Window, but be aware of potential blocked cues. If the values that cause the movement and colour change during the fadeout are tracked through to following cues, then Track Forwards will work alongside 'Remove'. You can alternatively use Cue Only in the tracking options within the Update Window and simply use syntax (UPDATE 3 THRU 7), which would apply the 'Remove' to all of those cues for tagged parameters. As the issue you're facing is rooted from information stored in cues, the cues themselves must be updated to remove that information. If you have any other questions, please feel free to ask. Archie
-
Hi @Zulu, It sounds as if the cue in which your fixtures fade out have position and colour information too. To let these fixtures fade out without any movement or colour changes, we need to remove that information from that cue. First, save a copy of your showfile so you can revert to it if needed (Z/Shift -> Save Show). Now select your problematic cue (the one to fade out the fixtures) and tap GO to proceed into that cue. Select your moving fixtures, then tap the Home icon (top left of the internal touchscreen). This homes & tags all parameters for the selected fixture(s). Now, we want to un-tag only the Intensity parameter so that the intensity of the fixtures still go to zero (e.g. that information is preserved), instead of previous values tracking through. To do this, tap the Z/Shift key, then tap 'Intensity' above the first encoder wheel - it should switch to have a dark background. That parameter is now un-tagged. Now tap the UPDATE key (you may have to hold it for the Update Window to appear on the internal touchscreen, this behaviour can be adjusted in SETUP -> Settings -> Record & Update), ensure 'Remove' has a red stripe (enabled) and Smart Tag has a blue stripe (disabled). Also make sure that 'Cue Only' has a red stripe so that we are only dealing with and affecting this cue. Tap your Master GO button to submit the update. You should now find that the fixtures fade out without changing position and colour. If you have any questions feel free to ask. Archie