Archie D
-
Posts
105 -
Joined
-
Last visited
-
Days Won
13
Everything posted by Archie D
-
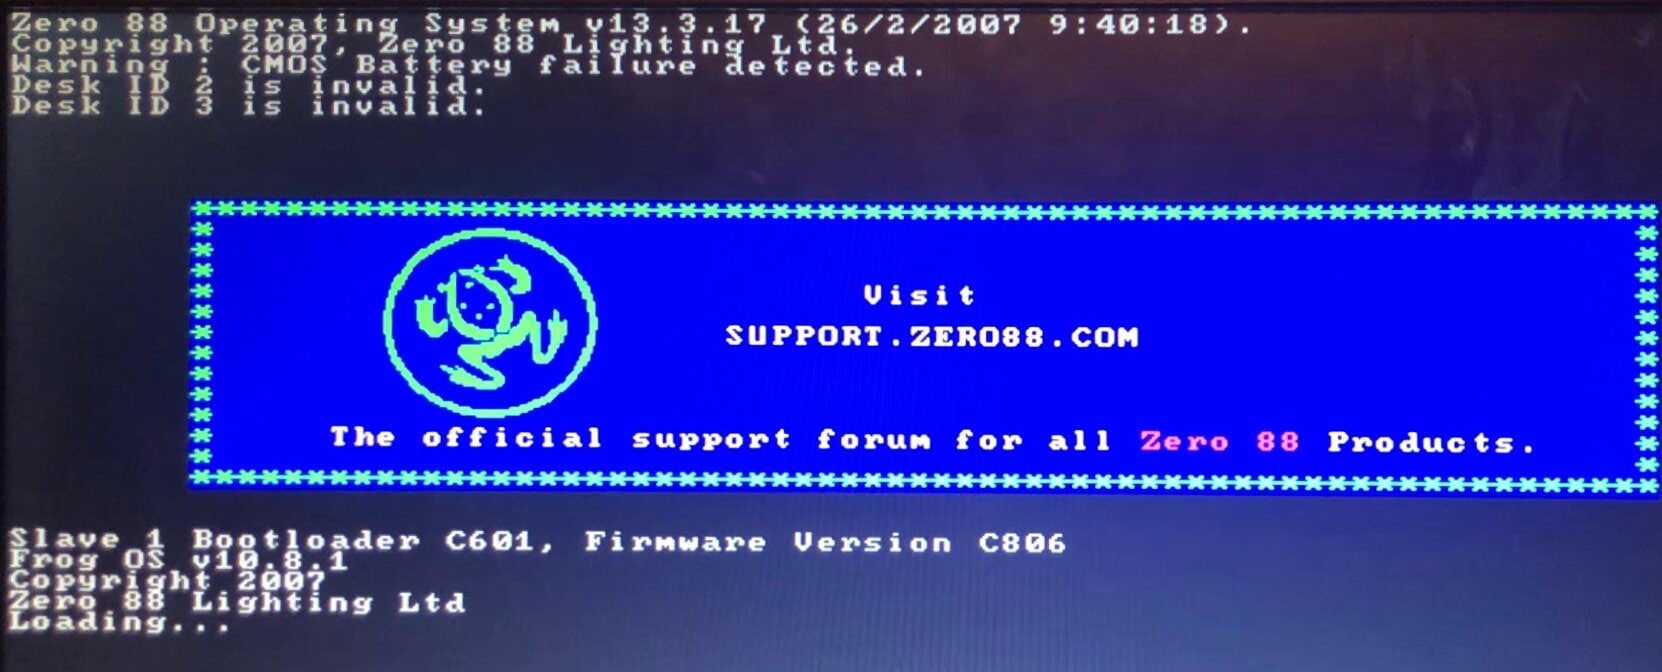
I agree with kgallen, this is most likely a battery issue. The battery is what holds the date and time along with the showfile data, so once the desk loses power it loses those if no battery is present. The time then resets and counts up from zero when powered on each time. Are you getting a message on the external monitor saying 'Warning : CMOS Battery failure detected.'? Following kgallen's advice - without attempting to reinstall the Frog Software, try powering on with a fresh battery and let the desk load into the memories screen, then cut power and turn on again. You should find that if the battery has been installed correctly, the second restart shouldn't show the 'Desk ID <number> is invalid.' message. As far as I know with the dipswitches on the channel fader PCBs, they are only used to tell the desk software which board is which. However, it would be a good idea while you've got the desk open to check they are in the correct position anyway. I hope this helps.
-
I've been running DMX out of Phantom ZerOS 8.0.1, and seems stable. Haven't experienced any crashes with regular daily use.
-
zeros functionality question for Solution
Archie D replied to Ed75's topic in Solution & Solution XL
Hi Paul, Yes - this is correct. My apologies, I should have mentioned that you'd need to delete the dimmer fixture already there. Worth noting, as a shortcut to delete all fixtures numbered 1-48, you can type 1 THRU 48 DELETE ENTER while in the Fixture Schedule tab of SETUP. The shortcut for THRU is '>' on a keyboard. Any further questions please feel free to ask. Archie P.S. they're not in the garage... they're all in the house... I may have to move out soon! -
zeros functionality question for Solution
Archie D replied to Ed75's topic in Solution & Solution XL
Hi @Muller Light, You can patch your RGBW fixture onto the faders by assigning it a fixture number of 1-48 (or 1-96 if using a Solution XL), and the fader will control the intensity. To control colour, the fixture must be selected. Solution consoles don't automatically select fixtures when channel faders are raised like FLX and FLX S consoles do, so you would need to select it manually. You can turn the channel flash buttons below the faders into fixture select buttons via SPECIAL -> Channel button mode -> Select. This replicates the behaviour of the select buttons on FLX and FLX S - tap to select, tap again to deselect. The button's yellow LED will illuminate when that fixture is currently selected. Once the fixture is selected, you can control the colour in the same way as fixtures that are on the MFKs. Hope this helps, Archie -
JesterML LCDs blank [still backlit] and MFK lcd top row malformed
Archie D replied to Archie D's topic in Jester Range
Don’t apologise - life gets in the way sometimes! I hope they’ve managed to sort the intermittent fault out. My JesterML had a ribbon cable that looked like the legs of the components on the front panel had pierced part of it. On the Blue Room, I assisted someone else identifying an issue with their front panel on a Jester 24/48. Their ribbon cable was pierced too. Seems like it might be a common thing? But not sure. Possibly could be solved by carefully cutting the component leg just below the solder joint while leaving a little bit of leg left, shortening the spike. That way the ribbon cable hopefully won’t suffer. -
JesterML LCDs blank [still backlit] and MFK lcd top row malformed
Archie D replied to Archie D's topic in Jester Range
Update time! The issue has been coming back intermittently. Rather late, but tonight I have just replaced the ribbon cable between the processor board and front panel with one which came out of my spare Juggler (has the same FC-26P connector). Will be monitoring how it does over this week and if the buggy LCD issue arises again. Will post progress on the issue. -
Hi Zulu, No worries - fantastic to hear everything’s working as intended now. Best of luck with your show! Archie
-
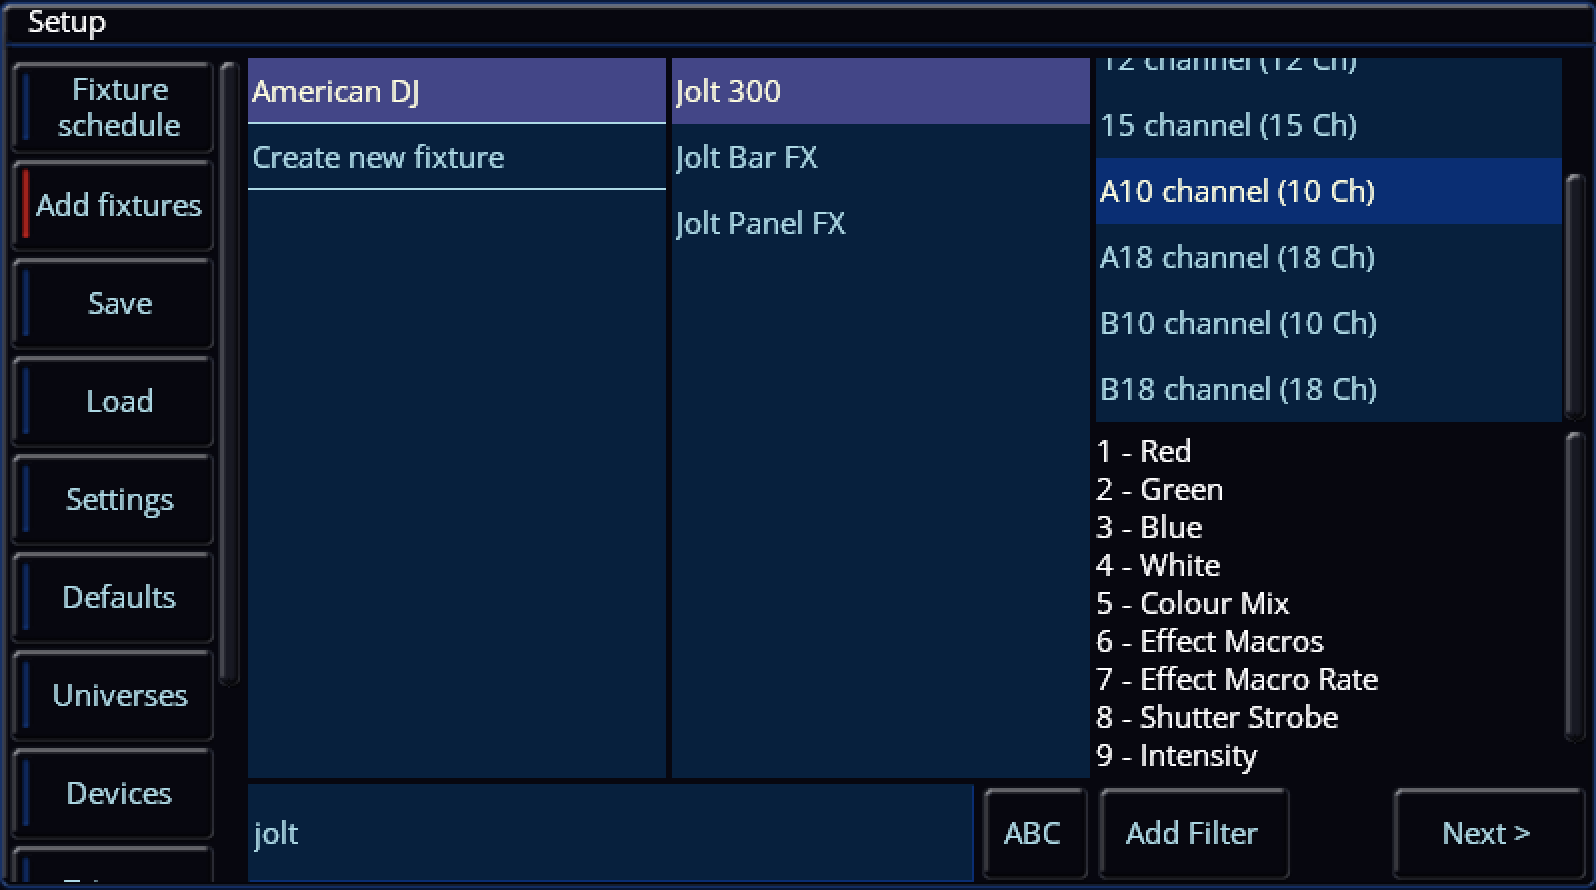
Hi @Petera, The ADJ Jolt 300 is available in the ZerOS Fixture Library on the console, therefore you won't need to match the channels to another fixture in the library. Archie

-
Hi Brian, When a playback with values stored is raised or active while recording a cue, those values are stored into that newly recorded cue. You can circumvent this by disabling Smart Tag in the Record / Update Options window (tap RECORD or UPDATE, then tap again to exit - selection will be stored). When Smart Tag is disabled, values coming from other active playbacks will not be recorded in, preventing slip-ups. The source options at the top of the Update Options window are effectively a way of telling the console what things you want to update in a single operation. It can be added to via syntax, e.g. UPDATE (the cue I am currently in is automatically in the source options), AND 2 (adds cue 2 to the source options, to specify cues from other playbacks at the same time use Playback Number/Cue Number). This means the console will be updating both the cue I am currently in as well as cue 2 with the desired 'Remove' operation. You can tap various items in the source options area to exclude them or add them, indicated with red and blue stripes. Correct - the values would be stored inside the recorded cue within the main stack, therefore they need to be removed from the cue. To remove a fixture entirely from a cue, you can follow my listed steps in my earlier post but leaving out the un-tagging of Intensity. Go into the cue, simply home the fixture(s) to tag all parameters and then remove from the cue via Update. I hope this helps - if you have any queries or require further explanation feel free to ask. Archie
-
Hi Zulu, No worries, glad to hear the solution worked on Phantom ZerOS for you. To 'fix' an individual cue, repeating the steps listed would work perfectly. However, if you have a range of cues together which all have the same problem, you could attempt using Track Forwards in the tracking options along with 'Remove' within the Update Window, but be aware of potential blocked cues. If the values that cause the movement and colour change during the fadeout are tracked through to following cues, then Track Forwards will work alongside 'Remove'. You can alternatively use Cue Only in the tracking options within the Update Window and simply use syntax (UPDATE 3 THRU 7), which would apply the 'Remove' to all of those cues for tagged parameters. As the issue you're facing is rooted from information stored in cues, the cues themselves must be updated to remove that information. If you have any other questions, please feel free to ask. Archie
-
Hi @Zulu, It sounds as if the cue in which your fixtures fade out have position and colour information too. To let these fixtures fade out without any movement or colour changes, we need to remove that information from that cue. First, save a copy of your showfile so you can revert to it if needed (Z/Shift -> Save Show). Now select your problematic cue (the one to fade out the fixtures) and tap GO to proceed into that cue. Select your moving fixtures, then tap the Home icon (top left of the internal touchscreen). This homes & tags all parameters for the selected fixture(s). Now, we want to un-tag only the Intensity parameter so that the intensity of the fixtures still go to zero (e.g. that information is preserved), instead of previous values tracking through. To do this, tap the Z/Shift key, then tap 'Intensity' above the first encoder wheel - it should switch to have a dark background. That parameter is now un-tagged. Now tap the UPDATE key (you may have to hold it for the Update Window to appear on the internal touchscreen, this behaviour can be adjusted in SETUP -> Settings -> Record & Update), ensure 'Remove' has a red stripe (enabled) and Smart Tag has a blue stripe (disabled). Also make sure that 'Cue Only' has a red stripe so that we are only dealing with and affecting this cue. Tap your Master GO button to submit the update. You should now find that the fixtures fade out without changing position and colour. If you have any questions feel free to ask. Archie
-
Hi Simon, It is extremely unfortunate that Ian passed away, he is definitely missed. Regarding the wheels - there is a tiny PCB on each wheel held by four plastic clips (two latch over the PCB and two stick up through holes on the PCB). If this PCB comes out of those clips and slides out slightly, the contacts don't meet the wheel and so the wheel's movements are not read correctly. If you don't get anywhere with White Light as kgallen has suggested, and are confident with opening your Solution up (the front panel along with the palm-rest hinges up from the base to an extent) then it may be worth checking those PCBs. If all PCBs are seated correctly and the wheels still do not respond correctly, it would be worth looking into spares. Hope this helps.
-
Hi Edward, Apologies for the delay, things have been rather busy this end. Thank you for your advice - when things have calmed down a bit I will have a look into the BIOS instructions, thank you for the link. I'll let you know the outcome. Many thanks again, Archie
-
Hi Edward, Thank you for your reply, I really appreciate it. That probably explains why I can't get into it. I was looking for the Startup Tool to future-proof the desk in case I need to do a fresh software install to recover it as the desk currently isn't picking up any bootable USB sticks (have tried multiple, including the MBR method), neither is it picking up the software CD supplied with the desk. Since it was introduced for FLX S, am I correct in thinking it will only accept .exe upgrade files instead of a whole bootable USB? Many thanks, Archie
-
No worries, great to hear.
-
I'd recommend using ZerOS 8.0.1 for your next show as I believe ZOS-12594 is the bug fix for the crashing issue in ZerOS 8.0.0. ZerOS 8.0.1 also fixes the issue when referencing a non-existent palette (ZOS-12752) using syntax (e.g. COLOUR 40 ENTER where Colour Palette 40 does not exist), previously this would crash the desk. This is actually quite useful if you accidentally hit the wrong key while trying to reference a palette (therefore entering the incorrect palette number, accidentally being one that doesn't exist), and then you have to restart the whole desk to gain control again.
-
Hello @alg, Move on Dark can be enabled via entering your playback's settings (hold SETUP + Tap Playback's button) -> Move on Dark -> Enabled. The 'General', 'Chase', 'Raise and Lower' etc. that you see along the top are tabs to access groupings of playback settings, they aren't buttons to adjust actual settings. By default, when opening a playback's settings window, 'General' will always be the first tab selected (hence you see General every time you open the window), as they are general playback settings which aren't necessarily specific to other tabs such as 'Raise and Lower' or 'Chase'. If you're perhaps thinking of playback defaults found in SETUP -> Defaults -> Playback Defaults, these settings will only be applied to newly created playbacks and will not change existing ones. (D:3.0) in a fade time cell of a cue indicates a delay, with the time before it (0.0 in your case) indicating the actual fade time. If a cue had "5.0 (D:2.0)" in the "Up" cell, when going into that cue the console would delay executing the fade for fading up lights in that cue for two seconds, then proceed with the five second fade. This can be useful in cases for example where you don't want a moving light to come up until it has actually snapped into its position to prevent seeing it swoosh across stage during an intensity fade up or for staggering fades. Hope this helps, if you have any other questions please don't hesitate to ask. Archie
-
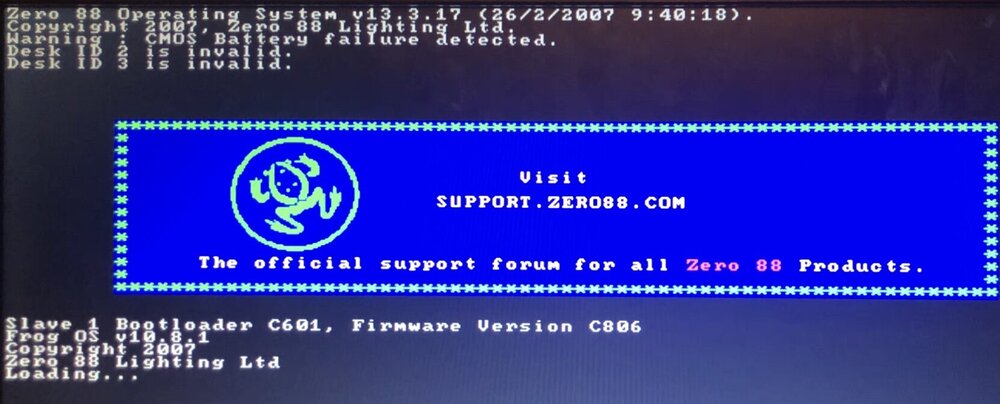
Hi all - unfortunately, I fear that this post may not get very far as most Frog 2 users have completely moved on (to my knowledge), but here goes.. On my Frog 2, I wish to access the ZerOS Startup Tool. Usually, you'd keep tapping F1 while the console is booting. If I do this on my Solution XL, it works as expected. Frog 2, nope... After the console's blue BIOS splash screen on the external monitor saying "Loading, please wait..." disappears, I keep tapping/holding F1 but the console boots straight into the main ZerOS application. The tapping/holding down of F1 is mentioned both in the online manual, and in a comment by Simon (original software developer for Frog2OS - that's ZerOS now). One theory that I've been thinking about - usually when updating the console with a bootable USB drive (old method), a screen would appear with an 'Update Software' button, I think that is using the Startup Tool application on the console's CF card (separate from the main ZerOS application). Even when I plug in a bootable USB or use the original 7.8.2.39 software CD to try and bring that update window up, still nothing. My conclusion is that the startup tool application doesn't actually exist on the desk's CF card. At some time, I plan to open the console and extract the CF card, pop it into my CF reader and see if the Startup Tool application exists on it. If it doesn't, I think I would be able to extract it from the Solution CF card (from memory the Startup Tool is from 2007 across all desks, so I think it should work fine) and put it on the Frog 2 one. Before I do that, are they any ideas anybody may have as to why this is happening? Many thanks for any assistance with this. Archie
-
Hi Ian, That's great news, glad to hear you got it sorted. Have a good day, Archie
-
Hi @Ian_p, Please could you upload your showfile here? We may then be able to figure out if it's a problem with the fixture itself, or if the fixture has some funny channel on it in the profile causing this erratic flashing behaviour, thank you. The previous 'Edit Fixtures' window to see and change defaults of fixtures was removed in ZerOS 7.9.3 in favour of the new Fixture Schedule section of SETUP. To see a fixture's defaults, you could select the fixture(s) and page through the different attributes and see each individual parameter value on the internal touchscreen of FLX S.
-
Good afternoon @Richard Elv, You can purchase a Phantom ZerOS Unlock Dongle from one of the distributors, or from here on StageGear. For outputting DMX with Phantom ZerOS, the Unlock Dongle must be plugged into your computer. If it is unplugged, DMX output will stop until the dongle is present again. Regarding methods of actually getting DMX out of your computer from Phantom ZerOS, you have two options. The first, is to output over the network using protocols such as ArtNet or streamingACN. The second, using a USB to DMX device (ones which support the ENTTEC protocol). Personally, I recommend the ENTTEC DMX USB Pro, which is generally considered to be a very high quality device and can be configured straight from ZerOS in SETUP -> Devices. Each of these devices will output one full universe of DMX. When running Phantom ZerOS as a FLX, you have access to 16 full universes of DMX (8192 DMX channels) over 64 patchable universes. If you're already used to using FLX, using a Phantom ZerOS Unlock Dongle will be ideal as it will give you the front panel you are already familiar with - just virtually. This can be used with a touchscreen, along with the external monitor for multi-touch functionality. Yes, the ZerOS Wing can be used with Phantom ZerOS running on a PC via USB as if you were using it with a physical console, therefore you will be able to use it across both your FLX and Phantom setup. Using a ZerOS Wing is the best option to give you more faders at one time. I hope this helps, Archie Bonjour @Richard Elv, Vous pouvez acheter une clé de déverrouillage Phantom ZerOS auprès de l'un des distributeurs ou directement sur StageGear. Pour la sortie DMX avec Phantom ZerOS, la clé de déverrouillage doit être branchée à votre ordinateur. Si elle est débranchée, la sortie DMX s'interrompt jusqu'à ce qu'elle soit reconnectée. Pour récupérer le signal DMX depuis votre ordinateur avec Phantom ZerOS, deux options s'offrent à vous. La première consiste à utiliser le réseau via des protocoles tels qu'ArtNet ou streamingACN. La seconde, à utiliser un convertisseur USB vers DMX (compatible avec le protocole ENTTEC). Je recommande personnellement l'ENTTEC DMX USB Pro, généralement considéré comme un appareil de très haute qualité et configurable directement depuis ZerOS dans le menu CONFIGURATION -> Appareils. Chacun de ces appareils génère un univers DMX complet. Lorsque Phantom ZerOS est utilisé comme FLX, vous avez accès à 16 univers DMX complets (8192 canaux DMX) répartis sur 64 univers patchables. Si vous utilisez déjà FLX, l'utilisation d'une clé de déverrouillage Phantom ZerOS sera idéale car elle vous permettra de retrouver virtuellement le panneau avant que vous connaissez déjà. Vous pourrez l'utiliser avec un écran tactile, ainsi qu'avec un moniteur externe pour une utilisation multitouch. Oui, la ZerOS Wing est compatible avec Phantom ZerOS installé sur un PC via USB, comme si vous l'utilisiez avec une console physique. Vous pourrez donc l'utiliser à la fois avec votre configuration FLX et Phantom. L'utilisation d'une ZerOS Wing est la meilleure solution pour disposer de plus de faders simultanément. En espérant que cela vous soit utile, Archie
-
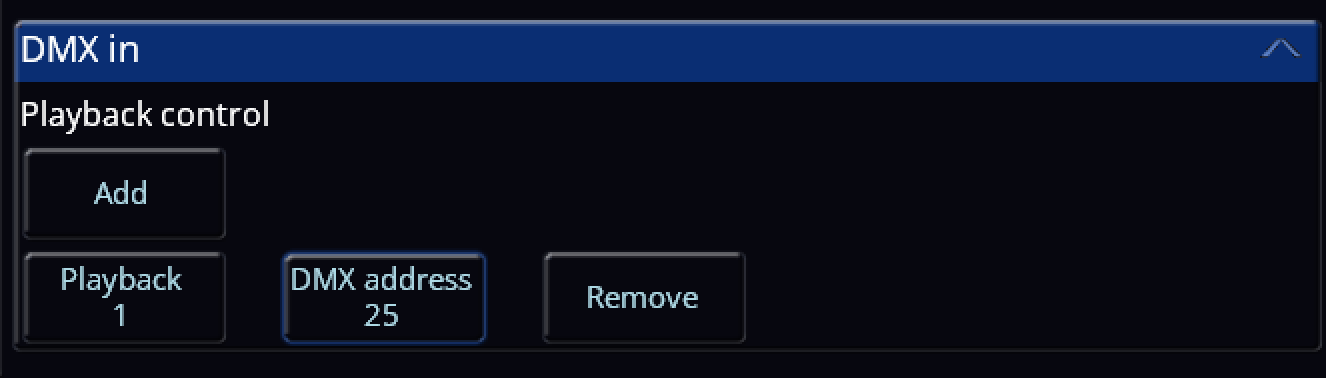
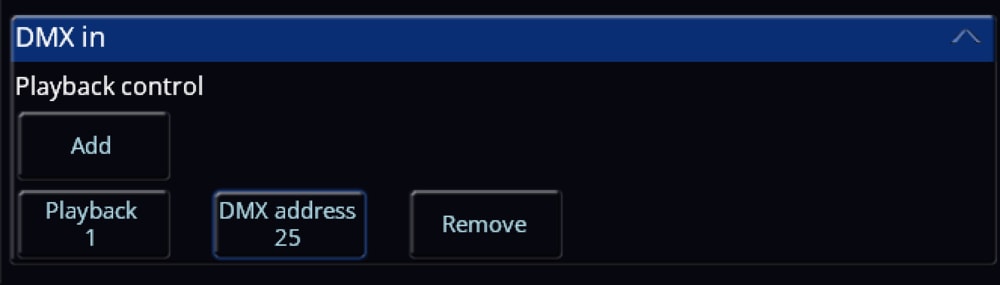
Hi @Richard Elv, Welcome to the Zero 88 Forum! Ultimately, it is highly recommended to use a ZerOS Wing to expand the available faders that can be used at one time on your console. However, using another console such as the FLX S24 is possible, but quite limited in comparison to a Wing. For instance, with this method, when you bring up a fader of a fixture on the FLX S24, it won't automatically be selected on your main FLX console, whereas on a Wing it interacts with the console and does select it automatically (depending on the 'Auto select channels' setting in SETUP -> Settings -> Operational -> Auto select channels). You also won't be able to do record, delete, SETUP + Tap playback button etc using the method described below, DMX Input. For using a FLX S24, you will need to configure one of your DMX output ports on the main FLX to be a DMX input instead. To do this, go to SETUP -> Universes, and tap 'DMX in' on the DMX output you wish to be a DMX input instead. On the FLX S24, you can patch in a bunch of dimmer channels (I recommend patching in the maximum available on ZerOS 8.0, which is 96). Then, connect the first DMX output port on the FLX S24 to your defined DMX input on the main FLX. You will need an adapter for the correct XLR connector to link the consoles together as they are both female XLR outputs. After this has been done, you now have a 'DMX In' column in your Fixture Schedule within SETUP. This lets you define a DMX In address for each individual fixture patched in, so when the console receives DMX data from the defined DMX input port (e.g. I raise channel 1 on the FLX S24 which has DMX address 1 -> FLX receives that data -> Fixture 200 in the FLX has a DMX input address of 1 -> Fixture 200's intensity raises), it will respond as configured. For playbacks, you can set a playback's DMX input address via SETUP -> Triggers -> DMX In. From there, you can tap 'Add' to add a playback to configure ready for DMX Input. In the example below (image attached), I have set Playback 1 on a FLX to be raised and lowered with DMX input address 25 coming from a FLX S24. I have done this so my first page of dimmer channels on the FLX S24 control fixtures, whereas the second page controls playbacks. (1-24 fixture control, 25-48 playback control). If you wish to use the Channels/Playbacks switcher button on the FLX S24, you could set up 96 dimmer channels (4 pages of dimming), use the first 72 (3 pages of dimming) as fixture control, but individually record each of the remaining 24 dimming channels at full as a playback each (playback 1-24), and on the main FLX you set the DMX Input address for each of your playbacks to the last page of dimming on the FLX S24. If you require control of more than 24 playbacks, you could go back further than the last page of dimming and use some of the third page too of the FLX S24. Overall, the ZerOS Wing has been designed to interact with the FLX or any other ZerOS console, and was produced for the reason of adding extra faders that can be used at one time. Using DMX Input is rather limited, so my recommendation is to use a Wing. But, I hope this helps, and if you have any further questions please don't hesitate to ask. Apologies for not translating, I figured if I did then this message would be colossal. Archie
-
I've done some digging, and it appears in the Chauvet P5 manual that they mention "The LEDs will automatically shut off after 60 seconds of sustained output. Reset the dimmer to re-enable LED output", indicating you'll need to take the dimmer channel of the fixture (CH15) to zero and back up again in order to re-activate the LEDs. I understand that you're using a Chauvet P7, but I'm thinking that this behaviour might cross over to the P7 too and just wasn't mentioned in the manual perhaps? Hope this helps advance this further. Archie
-
Hi @DSUK73, Welcome to the Zero 88 Forum. Using a Phantom ZerOS Unlock Dongle unlocks the maximum amount of channels available for the fully upgraded console you are emulating (e.g. emulating a FLX will give you 8192 channels = 16 universes, emulating a Solution will give you 2048 channels = 4 universes). Any USB to DMX device that supports the ENTTEC protocol should work with Phantom ZerOS, I personally use the ENTTEC DMX USB Pro and have two of them. Each ENTTEC DMX USB Pro device will output a single universe of DMX. You can, of course, output DMX over Ethernet via your computer's network port for less cabling out of your PC if you have an Ethernet gateway. Once the USB to DMX device is plugged in, it can be configured in SETUP > Devices. This allows you to set the universe being output on that device, output rate, etc. Purchasing an Unlock Dongle is a great investment and I highly recommend it. I hope this helps, let me know if you have any questions. Archie
-
Ah - after re-reading my post I realised I mis-interpreted part of your post! I apologise. But yes, that would definitely work loading the FLX S show file into Phantom ZerOS and editing it while emulating a FLX console to create a user macro. The only thing you'd run into is once loading the show file into the FLX S, re-saving it and then needing to create another chase later down the line, you'd need to re-construct the user macro again on Phantom as it originally won't have been loaded in to the FLX S. If the chase is in the same arrangement as before, I suppose you could copy the chase and just track through a colour change of the fixtures in each step.